Mafac Brake Hood Restorations.

Mafac logoOn March 5th, 2015 I wrote a review of the full Mafac rubber lever hoods available from Jordi at Reciclone in Spain. At that time, Jordi did not make reproductions of the rubber-covered adjusters as he had no Shipping Boxadjuster in good enough condition to serve as a master from which to take a mold. Subsequently, after conversations with Jordi, I wrote, “Jordi is currently evaluating the practicality of making matching adjuster rubbers which would need to be added to the owners’ own adjuster body.”

To assist him, I mailed him a NOS rubber adjuster and a matching metal adjuster mechanism. After repeated attempts, he was finally able to come up with a satisfactory reproduction. He then emailed me and let me know that a complimentary set was on its way to me as a thank you for the use of  my original which he had mastered  for his mold. When the box arrived, it contained my original adjuster cover and mechanism plus a finished adjuster cover set and an example of the prototype moldings.

This whole project arose out of the difficulty involved in getting Mafac branded hood covers for restorations and, to a lesser extend, for everyday use. This was a particular problem for Jordi as Reciclone does bike restorations as well as sales of period spares and accessories for vintage bikes. Typically, the gum rubber hoods and adjusters dry in the sunlight, harden and begin to Adjuster # 4 modifiedcrack and then crumble. (See the red circled area in photo.) The left hand adjuster in the photo is Jordi’s reproduction. One solution is to simply delete the adjuster. Another is to switch to the period correct alternative of the knurled metal adjusters or the metal adjusters with rubber O rings (which also perish). However, if the bike had gum rubber adjusters on its Mafacs and a restoration is to be absolutely correct, then that is what must be replaced.

Should you find yourself in that position and go to the Reciclone page for hoods, you will not see an adjuster listed as an available product. The reason behind that is the difficulty involved in making the adjuster covers. The covers I received were cleanly molded in gum coloured  rubber. They were a perfect, tight fit on the metal adjusters and accepted the chrome steel ferrules to support the brake cable end with no problem.  Below is a large image to allow you to view the reproduction adjuster clearly.


Adjuster # 5 cropped


One of the problems with reproduction hoods and adjusters is matching the colours of the gum moldings. In the accompanying photo below, the hood on the left is a Reciclone reproduction and the hood on the right, with an adjuster, is a NOS Mafac part that was received exactly as shown when new. Typically, Mafac adjusters and hoods did not match due to batch variations in a large-scale production environment.


Comparison NOS and Repro


In a practical sense, this means that Jordi could not guarantee that your hoods and his adjusters would match harmoniously due to the colour variability of the batches of rubber for the moldings. As well, being small parts, the adjusters are very picky to make. So, as nice as they are, the adjusters will be special order items only, not regularly offered merchandise. You will need to contact Jordi (reciclone1@gmail.com) directly at Reciclone to discuss an order and I would recommend having the hoods molded at the same time to optimize your colour match. Regardless of which route you choose, good luck with your restoration.


Mafac Hoods – A Review

Background

Mafac logowas a post World War II bicycle brake manufacturer based in the city of Clermont-Ferrand in the Auvergne region of south-central France. They remain known today among enthusiasts for their Criterium cantilever brakes , beloved of cyclo-crossers and early mountain bikers,mafac-cantilevers- criterium and their centerpull brakes like the Raid, Top 63, Competition, 2000, GT and the Racer. They also Mafac Full Hooded Lever Rebourproduced matching levers for these brakes which brings us to the central difficulty current users have with these products. Lever hood replacement.

This is a problem because people are rediscovering the excellent braking and modulation available with these centerpull brakesets, even the maligned and nearly universally used Racer. They are also discovering that the half hood and full hood rubber lever covers are virtually unobtainable as new stock. Contemporary lined brake cables like Velo Orange’s and JagWire along with Kool Stop brake pads (see test here) can greatly enhance the braking feel and power of these brakesets but whether for daily use or restoration, be ready to pay extortionate prices for new old stock (NOS) lever hoods. My recently restored (2015) 1970s Bertin C 37 has NOS gum rubber lever covers. With an auction purchase, shipping and import duties, the on-the-bike cost was $75 Canadian. Not what you would like to pay for hoods for your scruffy commuting Peugeot AO 8.

So, what to do? Scrounge old bike shows? Haunt EBay and look for used but not disgusting levers with hoods? Spidel Levers 2 BeforeRealize that as classic and vintage hobbyists, we are cheap but just take a deep breath and pay up for NOS? Go without?

None of those options are necessary any longer. While browsing on line, I ran across an online shop called Reciclone which sells NOS and reproduction parts for classic and vintage bicycles. The key word is “reproduction” because Jordi, the shop owner, makes molds for and Hoodsreproduction hoods for various brake levers, including Mafac. He has different style repros for Zeus, Campy, Universal, Weinmann, Shimano as well as Mafac. The full coverage lever hoodsMafac Half Hoods are offered on the site but half hoods are available by request if you email Jordi. These are correct to having the metal retainer clip molded into the half hood to retain the rear of the rubber cover to the lever body. (See the photo to the right.) The Mafacs are available in black or tan/amber in both half and full formats.


Review

Having seen the hoods on line in Jordi’s shop, I determined to buy a pair. I had one pair of OEM (original equipment manufacturer) replacement hoods tucked away but spares are always good, especially for consumables like this that are damaged by sunlight and ozone. I went on line and placed an order for one pair of amber hoods through the shop. (Black is also available.) Everything proceeded smoothly. Although the shop price shows 35 Euros, the charged price was 28.93 due to tax rebate. Shipping was 15 Euros for tracked international shipping (which I would appreciate later in the process) coming to a total of 43.93 Euros/ $64.97 CDN.

When looking at the amount, please remember the sharp decline in the $ CDN in February, the tracked postage cost and the fact that these reproductions are all hand molded. This is Jordi actually doing the hand labour not some injection molding machine.  The order was mailed on February 9th, left Spain on February 11th and spent a furtherShipping Box 11 days crawling through Canada’s postal system including a 5 day stay in Customs. Jordi’s efficiency and helpfulness were exemplary, Canada Post – not so much. When the parcel arrived, it had been carefully bubble packed and shipped in a clearly marked and classy box. The whole package was undamaged and could have been installed directly out of the box had I wished it. Included was a clearly written and illustrated set of instructions. (See reproduction immediately below.)

Installation Instructions Sheet

A close examination of the hoods revealed that they were well molded and robust.Flaw There was a slight inconsistency in the left shoulder of the hood near where it would rest by the handlebar but this had no effect on the strength or durability.  There was a very slight amount of mold flash at the joint line of the mold comparable to NOS Mafac lever covers. (See the photo below.) The installation Pieces plus adjusterinstructions were followed as provided with the addition of a few drops of water to make the solution more slippery. The lever used was an older Mafac Course 121 but since the alloy lever body is the same with Mafac’s Course 419 with the drilled lever blades here would be no problem with using these hoods on that type of lever. The plastic bodied lever of the same style would fit as well but theMafac Drilled Promotion levers Mafac Promotion plastic levers will not accept this or any other lever cover that I am aware of.


The lever cover was molded very accurately to the contours of the lever body. The hood stretched properly during installation with no stress marks in the corners or at angles. Once slipped on over Lever hood completedthe body, the hood was tight and wouldn’t move even given the slippery soap solution underneath. The metal adjuster for this type of lever fit perfectly as did the rubber covered adjuster of the drilled hoods with AdjustersCourse 419 style lever. The overall feel and look of the hood was the same as that of one of the NOS hoods that I originally had in stock. The rubber adjuster cover differs in colour in the photos because they were virtually never the same in “real life”. In the accompanying photo of the Repro and the OEM lever hoods, the reproduction is the lower of the two hoods shown with the original Mafac Comparison NOS and Reprohood shown with its original adjuster. Jordi is currently evaluating the practicality of making matching adjuster rubbers which would need to be added to the owners’ own adjuster body.


Conclusion

The Mafac reproduction hoods offered by Jordi at Reciclone are well made  and well fitted to the lever base. The comfort of the lever seems comparable to the NOS Mafacs. Those who use their bikes on a daily basis might want to consider the black versions of the hoods as they are probably less vulnerable to ozone and ultraviolet. It is very useful to have these reproduction hoods available to fill the gap created by the exhaustion of the NOS hood supply for both daily riders as well as for restorations. A big thank you to Jordi at Reciclone for the Mafacs as well as the other hood styles he has taken the trouble to reproduce.


Mariposa is Back!

Modern Mariposa logo  I had a lovely surprise when I opened my email in the first week of February. It was a notice that Mariposa Bicycles had reopened as a viable builder and that the core team of Mike Barry and Tom Hinton had been augmented with Michael Barry, Mike’s son and by daughter-in-law Dede Barry. Since this site is named Bertin Classic Cycles, it is reasonable for you to wonder just what the Mariposa announcement has to do with Bertins. In my experience, a very great deal.

When Mike Barry and business partner Mike Brown opened Bicyclesport at 175 King St. E. in Toronto in 1971,  they were attempting to recreate the classic British bike shop with the retail out front and a bespoke frameshop in back. It was about this time that my brother and I discovered the shop. It was fully worth the 160 km trip to get there. This was the magic kingdom! Parts and framesets, whole bikes like those of Jo Routens only ever seen in Cycling or other exotic publications! When the shop moved to larger premises at 179 King we followed along and here the frameshop was relocated and Mariposas really began to be popularized. They were raced with the Queen City Bicycle Club (QCBC) and toured with the Toronto Randonneurs, went through Paris-Brest-Paris and the Raid Pyreneen ably ridden and promoted by Mikes Barry and Brown. It was there that I purchased a Ron Kitching frameset from Mike. It was actually a Durifort built Bertin, relabeled as a RonKit, and I loved it. Mike told me it was too small and after riding it for a year, I finally had to agree and resold the bike.

Shortly afterward, in 1988, Mike decided to close Bicyclesport for a variety of reasons and I thought that I had missed for good any chance at a Mariposa. I went to the closing sale and stocked up on all the exotic French parts I needed. Enthusiasts throughout southern Ontario mourned the loss. But Mariposa wasn’t entirely gone. Mike quietly, almost covertly, reopened in a back alley off Front Street in a new store called Bicycle Specialties. It was small-scale, enthusiast oriented and, once again, Mariposas started to be built downstairs but painted off site.

About 1995, the store move to Millwood Road to a larger premises and it was there I purchased a used Mariposa from Mike.

Mariposa - Grey

I loved it but, again, Mike warned me that it was too small. I proceeded, nonetheless, and rode the bike until after Mike had, once again, relocated the business to an industrial condo on Canfield Drive. Finally, I gave up and asked Mike to resell the bike. At 58 cm, it was just too small. While at the store, I saw a bike in a 60 cm frame size and decided to get it as replacement for the silver Mariposa since I couldn’t afford the wait time or cost of a new one and  so, I purchased my first known Bertin.

Old Bertin Photo


For the restoration, Mike built the light bracket and the fender stays out of tubular cro-mo steel, the bag support having been made by him for the bike’s previous owner.


A custom demountable handlebar bag holder to attach to the stem. Note the small locking lever.

A custom demountable handlebar bag holder to attach to the stem. Note the small locking lever.


A socketed bracket to permit mounting to the Mafac pivot bolt.

A socketed bracket to permit mounting to the Mafac pivot bolt.


Socketed stay ends for fender attachment.

Socketed stay ends for fender attachment.


Tom Hinton did the all the custom braze-ons and paint. Mike arranged for custom decals to be made and when it all came together it looked like this:


Bertin - Jim # 2

I have enjoyed the bike tremendously but still, in the back of my mind, I had always thought there would come a time when I would take another shot at a Mariposa. However, in 2007 just like with Bicyclesport in 1988, Bicycle Specialties closed and Mariposa production ceased.

Now, for me and many other cyclists, there is real reason to celebrate as Mariposa and Bicycle Specialties come back on stream. Once again their racing, touring and city bikes will be available as will their meticulous restorations of classic bikes all accompanied by the considerable experience and knowledge of the team which will build or renovate them. Don’t underestimate the importance of experience; if I had listened to Mike, I would have had a properly sized bike the first time but then, I would have missed out on two cool Bertins!

Bertin C 37 Restoration Part 10 – The Final Reckoning


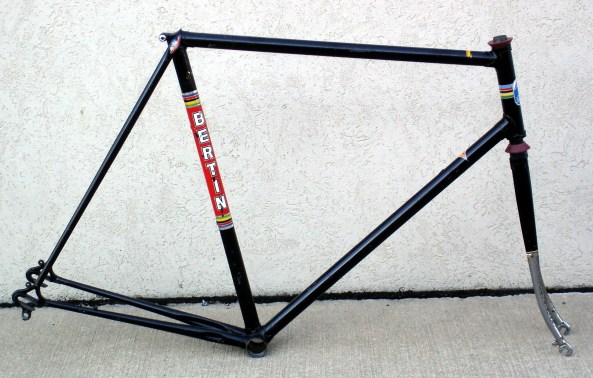
Well, the project will be complete with this final assessment. The original, 1970s, black C 37 has gone from this –


Tims Bertin C 37 blk

to this-

Drive Side Profile

to this –


After - Drive Side Profile

and, finally, to this-


Drive Side Profile


It has been a long process, longer than originally considered, and more expensive due to changes and glitches that were unforeseeable at the start. Remember, this bike was intended to be a rider and not a wall hanger so it did not receive NOS everything in a bid to make it perfect. Instead, used and donated parts were scavenged and used where appropriate. A few observations for those following a similar path:

– have a clear idea of what you want to have when you are finished (wall art? daily rider? show bike? historic conservation?);

– estimate your time line and then double it;

– do your financial estimations and add a 25% cushion for dealing with the unexpected ;

– line up the suppliers that you intend to use (some framebuilders/painters have very long waiting lists);

– do a trial assembly of the major components to assess brake reach, seat post fit, hub spacing and bottom bracket and headset threading;

– be sure you have any specialized service tools like the dedicated crank extractor for early Stronglights or Helicomatic freewheel wrenches;

– start with the best condition and equipped example of your favoured bike that you can find to minimize project length, complexity and cost;

– use various sized zip closed plastic bags to contain all the parts of each component or sub-assembly, label a post-it and place within each bag;

then stand back and admire the result!

Below you will find an itemized list of the costs for parts and labour during the project. They are given in U.S.$ as many of the parts came from American sources and Euro and Pound Sterling purchases have been converted to match. As well, items which were in my personal stock of cast offs and unused are priced as if they had been purchased on EBay to give a person starting from scratch a more complete and truthful appraisal of the project’s costs. The total was surprising as my pre-restoration estimate had been about $1,200.


Bertin C 37 Restoration Costs

(all costs include applicable shipping and taxes)

Items

Cost   (in U.S. $)

Stronglight headset – used * 40
Helico/Module E 2 wheels – used * 100
frameset – used 185
Simplex seatpost – new 78
Velo Orange cables – new 22
bolts – new 2
Tressostar bar tape – new 18
tubes – new 16
Mafac lever hoods – NOS 75
Stronglight bottom bracket (French) – used 25
Helico Freewheel – used 50
Stronglight crank remover – new 50
Velocals decals – new 64
Spidel cups – NOS (English Threaded) 25
Spidel drilled brake levers – used 68
California Springs water bottle – new 4
Silca frame fit chrome pump – NOS 30
Brooks Professional saddle – used * 90
Velox rubber bar plugs – NOS 20
Seat post frame fixing bolt (cro-mo) – NOS 6
Spidel LS 2 brake calipers – used 20
TA steel bottle cage – used * 40
Michelin 700C x 23 tires – NOS * 120
Stronglight 93 crankset – used 90
Park grease – new 15
hub bearings (5/32” for helico hub) – new 12
frame services, paint and decaling 400

Total:

 $1,787

 * These items were previously owned or gifted to the restorer. Costs are for equivalent items if actually purchased from EBay.

Bertin C 37 Restoration Part 8

The frame work on the Bertin was done by Jody Lee of Jester Bicycles based here in the Niagara Region of Ontario, Canada. (Contact information is available in the special box in the right sidebar of the site.) In Part 5, you saw the raw metal work prior to final finishing and priming as shown in the previous link. Once the paint was stripped and final finishing and priming took place, Jody painted the frame and fork in his spray booth. The paint was a two stage, base coat / clear coat and the two photos below reveal the frame and fork freshly painted, decaled  and hanging up curing.

Frame After

Frame after Decals and Before Final Polish


Front View - Head Badge

Front View – Head Badge


The decal work on the frameset was from Velocals. The period French Reynolds 531 seat tube decal as well as the specific Bertin  decals were all perfectly rendered as was the clear chainstay protector. The total cost for the decals was $63.85 USD. Previously, Jody had colour coated the frame, clear coated it, applied decals and then catalyzed clear coated followed by fine compound. I waxed the frame after it had cured with standard, Simoniz automotive paste wax. The cost of the frame and fork single colour paint job was $250 CDN which compares very favourably to the $625 CDN for a single colour frame and fork paint job at a Toronto firm.

Below are some roughly comparable before and after photographs of the frameset. To see detail, click on the photo to enlarge it and click on the enlargement to enlarge again and maximize details.


Bertin R Profile 1

Before – Drive Side Profile


After - Drive Side Profile

After – Drive Side Profile


Before - Lower Fork Legs

Before – Lower Fork Legs


After - Ends of Fork Legs

After – Ends of Fork Legs


Before - Seat Lug and Stay Cap

Before – Seat Lug and Stay Cap


After - Seat Lug and Stay Cap

After – Seat Lug and Stay Cap


Before - Rear Stays and Dropouts

Before – Rear Stays and Dropouts


After - Rear Stays and Dropouts

After – Rear Stays and Dropouts


In Part 7, I had advised restorers to check the fit and functionality of all parts as soon as they are obtained to avoid slow downs later.  Although Jody had checked alignment, facing, chased threads and handed the frameset back with the headset installed, I had not properly checked seat post fit. A Simplex post I thought had been machined to the correct diameter did not fit and the seat tube was slightly undersize as well. I ended up ordering a NOS (new old stock) Simplex seat post from Bicycle Classics and having Jody Lee ream the seat tube out and hone it to 26.6 mm from the stock 26.4 mm of the French dimensioned Reynolds 531.

As it is now, the last of the cutting oil from the reaming has pooled in the bottom bracket shell and been removed so it is possible to install the cups and axle of the Stronglight 93 bottom bracket. The next phase of the project is final assembly and then a project evaluation. Part 9 will be the installment on assembly and shake down and that is next.